Photo Organizing Tips

A few of you wrote to me after I posted about my new year's goals to ask how I sort my photos.  Apparently just about everyone in the universe has piles and piles of images on their phones and computers, and/or paper envelopes full of prints and negatives in boxes. It took me a while to figure out a system that worked for me, but since it does, I thought I'd share it. *Although I write here about digital files, the same process works for film.

A pile of photos

1.  Once a month I download all the photos from my phone and cameras onto my computer and into my photo software. I use a program called Adobe Lightroom to organize photos on my computer, but iPhotos or whatever program you currently have is fine if it works for you, and as long as you can rename your files and sort them into folders and subfolders.

2.  I download all those files into a folder I call “TO SORT”.  Creating this folder has helped enormously because I know exactly where stuff is that I haven’t looked through yet.  Here I weed through the images, getting rid of duplicates, etc.  If I have 5 photos of the same thing, I’ll pick the best one to keep (two if I can’t decide).  Then I delete the ones I’m not keeping.  Be ruthless!!!

3.  I've created a folder structure organized by year and month, with special trips & events having a folder of their own within that particular year.  I found this to be the simplest solution.  I thought of trying to group stuff by category: garden photos, flying photos, etc, but I liked having a chronological order instead.  I can always tag or label my images to reflect a category if I want to.  I put the number of the month in front of the name or they’ll arrange themselves alphabetically and, thus, out of order.

Photo Sorting Screenshot.jpeg

4.  Once my “TO SORT” folder of images is culled, I’ll add them to the proper month’s folder (eg, 04-April), and then rename the images once they're in the folder.  I name each image with the year, month, and then a sequence number: 201704-01, 201704-02, etc.  You should be able to automate this process within your photo software.

5.  After I've sorted & renamed files, I make sure to back up my hard drive and then I delete images I don't still want on my phone.

* The secret to making this work is to be diligent about setting aside time to do this.  Start NOW with the new system, and then just catch up with the rest slowly.  Yes, I am overwhelmed with years of a backlog, but now I just spend 10 minutes every morning going through photos.  Eventually they’ll get done. It’s amazing, too, how many photos I'm able to delete after some time has passed because I'm not as emotionally attached.  Also, because I’m so sick and tired of the mental energy required to hang on to everything forever, I’ve gotten kind of fired up about getting rid of anything that I don’t truly love.

* At the end of the year, I delete everything off my phone except my few favorites from past years.  If you take a ton of photos, try doing this more often :-)  I also look through & delete images from my phone when I have a few random minutes, say, waiting at the doctor's office or standing in line somewhere. It beats wasting time on social media.

* For those who have film and actual photographs, this system still works. Just use envelopes with the month/year system.

An older box of my photo envelopes

An older box of my photo envelopes

If you are feeling ambitious, you could get archival sleeves to store your negatives, and even have them scanned so that you can get them into your computer. (If you're local to Columbus, McAlister Photoworks does this, and if you're not getting giant pro-level scans, it's pretty inexpensive.)

Negative sleeves

Negative sleeves

I hope this helps!  If you have a different system that works for you, please share it... I'd love to know how others tackle this overwhelming task.

Instagram Round-up: Tucson

A few photo friends and I decided to meet in Tucson a couple weeks ago to talk shop, pick each other's brains, share new work, meet up with our photo mentor, and attend photographer Masao Yamamoto's lecture and exhibition opening at the Etherton Gallery. (And also do whatever else we felt like doing.) We created our own conference, and are already thinking about next year's plans to meet up again (all photo friends are invited!)  It was truly an inspiring week. Here is my short collection of Instagram images from the trip:

Our Lady of the Pinecones

Our Lady of the Pinecones.  This little backyard shrine was tucked into an alcove at our Airbnb. She wound up meaning a lot to me, coming to represent the guardian of all the new ideas and plans for my art projects that surfaced during this trip. I don't have to worry about a thing, because Our Lady's got my back. 

Fox on the mantel

This little guy was the first thing I noticed when I walked into the living room of our Airbnb.  He is the CUTEST.  

Backyard planter

Backyard greenery.  I loved this.  It took us forever to figure out that the building behind this planter was a garage.  We thought it was the host's house because it looked too pretty to be a garage, so we were extra quiet and didn't walk around the yard.  The house manual kept mentioning a garage though, and finally we went looking for it, only to discover that it was staring right at us the entire time.  Lol!

Swan's house

Swan's house.  Four years ago I took a photograph of this tree.  I thought I should take one this time too.  I loved spending the morning on Swan's back porch, soaking up all I learned during my photo consult and waiting for Elizabeth to finish hers.  (While eating delicious, fresh-out-of-the-oven vanilla poppyseed pound cake.) (And helping Catherine un-stick a cholla from her finger.  Those things are crazy!)

Prickly Pear

Prickly Pear cactus, photographed on the drive up to Phoenix.  We chose to go the long way that wasn't a highway, so that we could stop if we saw something interesting.  There wasn't all that much time in between leaving Tucson sprawl and entering Phoenix sprawl.  But oh well.

Tanoue Shinya 

We visited the Phoenix Art Museum, and got through it in a bit of a hurry as we were going to meet another friend of mine for lunch.  Even in a hurry, though, there is always something that makes you stop and really look.  I loved this sculpture by Tanoue Shinya. It reminds me of waves on a deserted island that's the texture of maple tree helicopter seeds.

Cornelia Parker, Mass (Colder Darker Matter)

I'm always drawn to big installation pieces, even if I don't understand what they're necessarily about. Things hanging from the ceiling, something that takes up an entire room, maybe video and sound and three-dimensional objects all combined into an experience.  This one was very straightforward and so beautiful: Mass (Colder Darker Matter) by Cornelia Parker. These were the charred remains of a church that was struck by lightning.  It even looks like it's in the middle of exploding. Mass. Science and religion in the same word.

lisa-sette-gallery-claudia-retter.jpg

The Lisa Sette Gallery.  After lunch in Phoenix, we popped in to see what exhibits were up and chat with Lisa a bit.  Of course, what do I photograph... ?  the doorway on the way out.

Orange patio table and chairs

Patio chairs and table at the Airbnb. This was my favorite place to sit.  Sunshine-y but shady, and big enough for us all to share our projects, drink tea (or Woodford, depending on when you stop by), and cheer each other on to do all the good work we want to do this year.

Kitt Peak

Kitt Peak, looking out from my favorite cliff.  I hemmed and hawed about whether to drive all the way out there or not, but after taking Elizabeth to the airport I just couldn't NOT turn west instead of north.  I hope it's in the cards this year to go back and stay for more than a couple hours.

Thank you, Tucson.  You never fail to deliver just the right mix of art, outdoors, great company, and a kick in the pants to get my work done!

Thankful

I have a lot to be thankful for.  As I write this, I have a floor-to-ceiling window view of the mountains outside of Asheville, North Carolina, all sunshine and quiet.  Before we left for this vacation -- to spend Thanksgiving with my brother and his wife at the house my family rented for countless Thanksgivings before my parents died -- an envelope showed up in my mailbox: a thank-you accordion book made by art students at the Ohio State School for the Blind.

Accordion thank-you book made by students at the Ohio State School for the Blind.

Last year I met the OSSB's social studies teacher at a conference I attended.  I’d listened in on a conversation he’d been having about how much the students at OSSB love their art classes, and we got to chatting. I told him about my Flying Adventures book, and he wanted to put me in touch with the art teacher at the school, thinking that there might be an opportunity for some sort of collaboration. One thing led to another and -- poof! -- all of a sudden I was going to be a guest presenter. 

I was excited about the idea, but had no clue how to go about teaching visually challenged kids to make books.  In the end I figured, just do what you can, keep it simple, and somehow it will work out.  Also, over-prepare!  I brushed up on book formats (with Sherman's help), trying to figure out what might fit into the timeframe I had.

My cat, Sherman, helping out with research.

I practiced by closing my eyes and imagining how to explain what I was doing: creasing paper, finding a center, tearing paper, using a bone folder.  It felt like trying to brush my teeth or write with my left hand instead of my usual right.  You really have to think hard about every single little step that you don't usually have to think about.

My sample pocket accordion book.

My sample pocket accordion book.

I started the week off with a Flying Adventures reading, and then got to work.  The kids were great... polite, funny, gracious, generous.  They helped me learn how to teach (and showed me how a braille typewriter works!) Yes, they needed help here and there, but they were able to help each other too. We folded mini-books out of single sheets of paper, made accordion books with tabbed extensions, and also ones with pockets.

A student's accordion book.
A student using a bone folder.

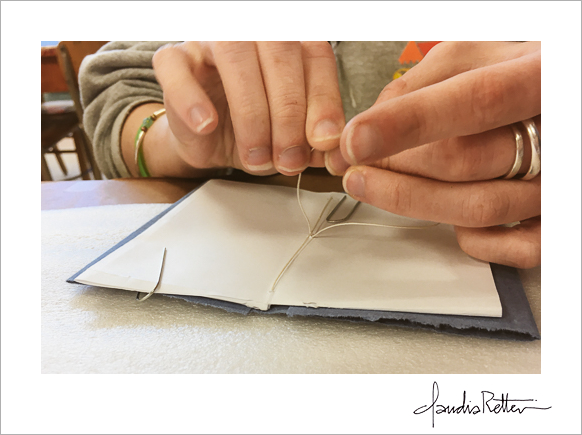
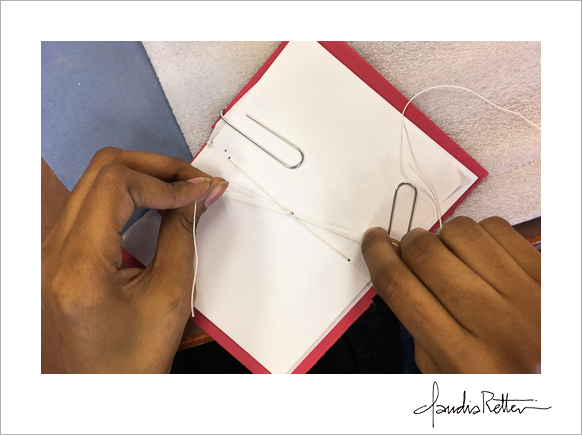
We creased, folded, glued, cut, made covers, and even did some pamphlet stitch sewing.

A student sewing a pamphlet binding.

One girl, after tying the final knot in her thread, smiled.  “I made a real book!” she said. That gave me happy goose bumps.

Tying the final knot in a pamphlet-stitch book.
Books we made in class.

After my week of classroom visits ended, the students worked on their own personal projects, choosing one of the book structures we practiced and making it their own.  In the spring, they’ll be exhibiting their work at the state library, and I can’t wait to see it.  To tide me over, they emailed me some photos of their projects.

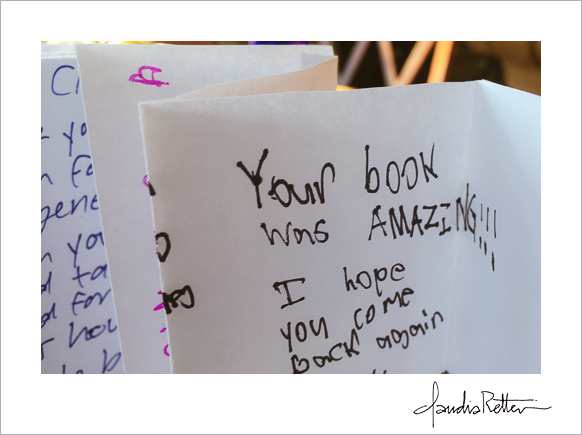
And then this amazing thank you gift arrived: an accordion book that stretches around my entire kitchen counter.  Every student designed a page, some with words, others with artwork. One in braille.

Thank-you accordion book from students.
Thank you from a student.

It's been an absolute honor to work with the OSSB students, and I can't thank them or the school enough for giving me the opportunity to share a little bit of what I know.  Thanksgiving?  Most definitely.  This is what it's all about.  

The art shark!

ps -- Miss Rachelle has THE best art room.  My favorite thing?  The art shark!  

Wishing you a very happy Thanksgiving!

READ PART 2 HERE (about the students’ final projects)